


MPPT Micro Solar Inverter MPPT Pure Sine Wave Inverter with AC 230V Cable
- Brand: CNCEST
- Product Code: BI-HJCSM-3198
- Availability: Out Of Stock
- Description
- Reviews (0)
- Recommer
- Delivery and Return
- Plage de tension Mppt : 24 V-40 V.
- Operating temperature range: -40°C to +65°C
- Transformer: high frequency transformers, separated by electroplating
- Built-in Grounding: Grounding of the device is provided by the Pe in the AC cable. No additional soil is required.
- Protection functions: isolated island, voltage, frequency, temperature, current, etc.
Material: The head is made of 40 Cr chrome steel which is not easily deformed. The semi-hexagonal type is more suitable for nut placement.
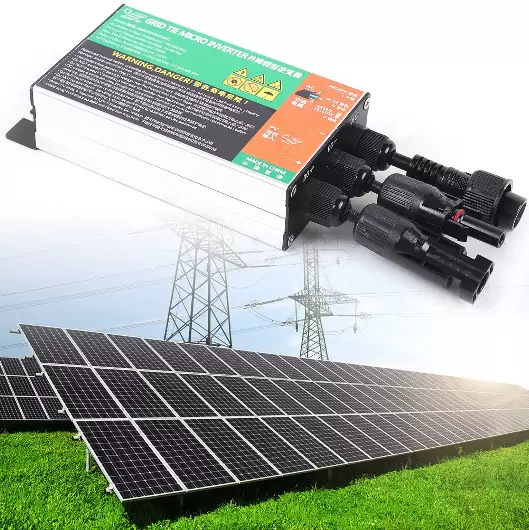
The microinverter inverts each module. The advantage is that each module can be controlled independently by MPPT, which can significantly increase the overall efficiency.
More details:
Specification:
Input data (CC, PV)
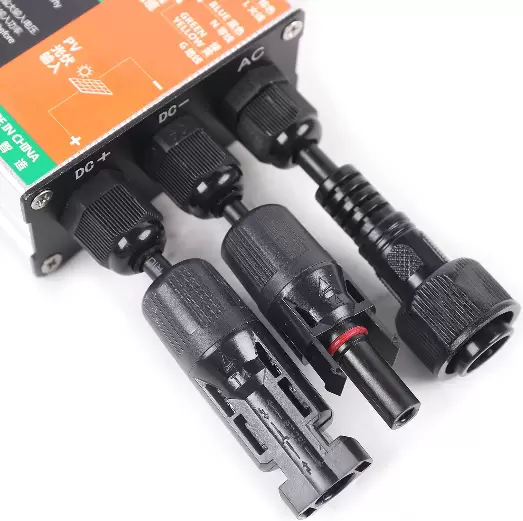
Number of MC4 input connectors: 1 set
Plage de tension MPPT : 24 V-40 V
Operating voltage range: 18V-50V
Maximum input voltage: 50 V
Starting voltage: 18 V
Maximum input power: 260 W
Maximum input current: 10.4 A
Output data (AC)
Type of single-phase network: 230 V
Rated output power: 250W
Maximum output power: 260 W
Rated output current: 230 V: 1.08 A
Rated output voltage: 230 V AC
Default output voltage range: 230V AC: 180V-280V
Rated output frequency: 60 Hz
Default output frequency range: 60 Hz: 57.5 Hz-62.5 Hz
Power factor: > 0.99
Total harmonic distortion: THDEfficiency
Maximum efficiency: 92.5%
CEC weighted efficiency: 230 V AC: 91.5%
Nominal MPPT efficiency: 99.9%
Nighttime electricity consumption:Mechanical data
Ambient operating temperature range: -40 to +65
Storage temperature range: -40 to +85℃
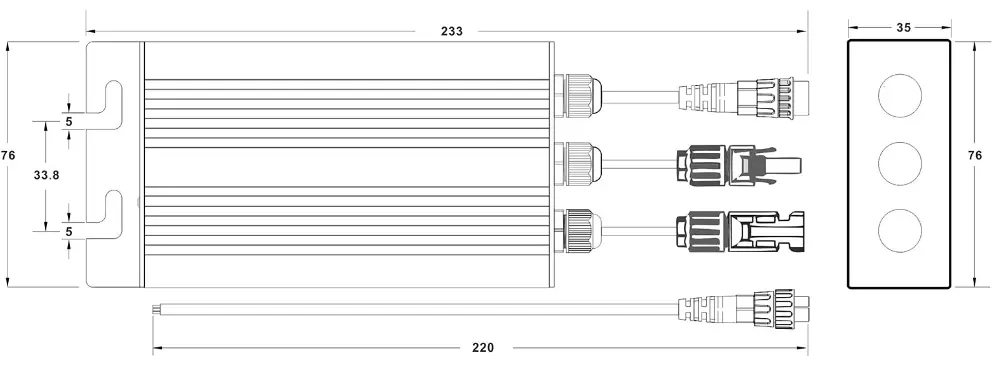
Dimensions (L x H x P) : 35 x 76 x 233 mm/1,38 x 1,81 x 9,17
Weight: 0.5 kg
Waterproof level: IP55
Cooling mode: natural convection - no fansInstallation procedures:
Step 1- Attaching the Microinverter to the Rack.
a.Mark the location of the microinverters on the rack, relative to the PV module junction box or any other obstruction.
b. Mount a microinverter in each of these locations using hardware recommended by your module rack supplier.
Step 2- Connect the AC cable of the microinverter and connect it to the AC bus cable (L-Brown, N-Blue, G-Green and yellow) one by one, please do not exceed the maximum current of the bus cable AC.
Step 3 - Connect the Microinverter to the Pv Module, Please Do Not Exceed the Pv Voc Panel(s)
Loading...
Loading...
Loading...
Loading...