
.jpg?x-oss-process=image/resize,m_fill,w_1000,h_1000 "720W High Pressure Floor Joint Machine – House Floor Joint Machine")


.jpg?x-oss-process=image/resize,m_fill,w_1000,h_1000 "720W High Pressure Floor Joint Machine – House Floor Joint Machine")


.jpg?x-oss-process=image/resize,m_fill,w_1000,h_1000 "720W High Pressure Floor Joint Machine – House Floor Joint Machine")
.jpg?x-oss-process=image/resize,m_fill,w_1000,h_1000 "720W High Pressure Floor Joint Machine – House Floor Joint Machine")
.jpg?x-oss-process=image/resize,m_fill,w_600,h_600 "720W High Pressure Floor Joint Machine – House Floor Joint Machine")


.jpg?x-oss-process=image/resize,m_fill,w_600,h_600 "720W High Pressure Floor Joint Machine – House Floor Joint Machine")


.jpg?x-oss-process=image/resize,m_fill,w_600,h_600 "720W High Pressure Floor Joint Machine – House Floor Joint Machine")
.jpg?x-oss-process=image/resize,m_fill,w_600,h_600 "720W High Pressure Floor Joint Machine – House Floor Joint Machine")
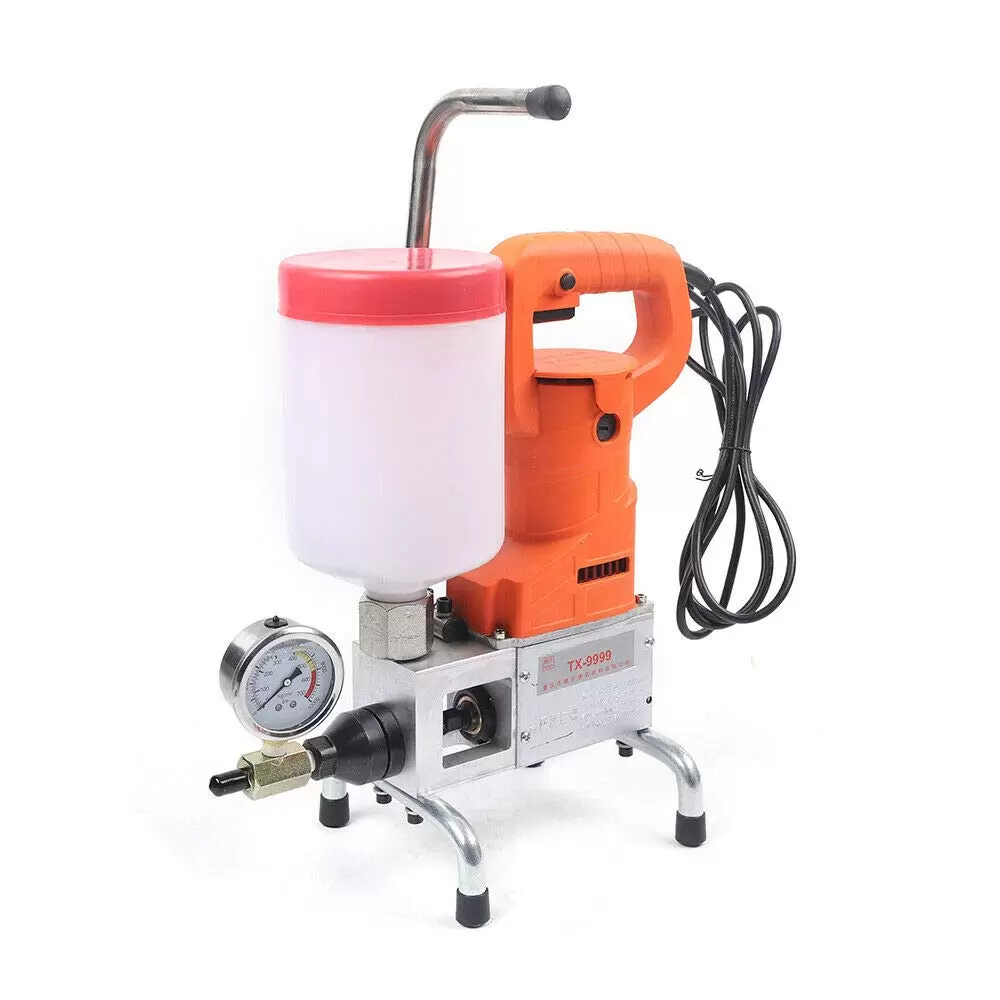
720W High Pressure Floor Joint Machine – House Floor Joint Machine
- Brand: CNCEST
- Product Code: BI-MLCYT-1460-EU
- Availability: In Stock
- Description
- Reviews (0)
- Recommer
- Delivery and Return


.jpg)

.jpg)
Specifications
| Product Name | High Pressure Perfusion Machine | Material | Aluminum, Iron |
| Rated Power | 720W | Voltage / Flat Rate | AC 220V/50HZ |
| Maximum Output Pressure | 10000psi | Start Again | 7500psi |
| Maximum Pressure of High Pressure Pipe | 10000psi | Switching Valve Safety Range | 18000psi |
| Delivery Flow | 0.75 kg/ min ( 1.65lbs/min) | Size | 39*20*43cm/ 15.35*7.87*16.93in |
| Net Weight | About 6.2kg/ 13.67lbs | Gross Weight | 6.5kg/ 14.33lbs |
Product Tips
.jpg)
Notes
1.When operating, operators should wear a series of protective measures such as protective glasses, protective gloves, protective clothing, and insulating rubber shoes. Other unrelated personnel should stay away from the machine operation radius of more than 5m and operate according to the operating procedures.
2.Please avoid dust in the material cup during use. When working in a humid environment, please pay attention to leakage protection.
3.When using, please do not exceed 500kg machine pressure. If the high-pressure hose is worn out or used for more than 200h, please replace it in time.
4.Please do not test pressure with thin substances such as banana water or acetone (clean engine oil is available). And do not inject strong corrosive materials, such as acrylic salts or water curing.
5.Please do not let the machine run for a long time with no load, otherwise, it will lead to pump strain damage.
6.Please allow the slight color difference caused by the shooting light and 1-3cm error due to manual measurement, and make sure you do not mind before ordering.
Product Tips
.jpg)
How to Use
1.Cleaning: Detailed inspection and analysis of leaks to determine the location and spacing of grout holes. Clean the area to be worked on and remove sediment from the concrete surface to ensure a clean surface.
2.Drilling: Drill a pressure relief hole around the hole with a 14mm/0.551in diameter drilling tool at a 45" drilling angle. Rinse the grouting hole with a washing machine until the grouting hole is clear, then you can proceed to the next step.
3.Buried Port: observe the pressure of the main leak hole. When the water flow is not rapid and the pressure is not large, the grout stopper pin can be buried with a fast-drying plugging agent. After the structure is stable, re-drill the wooden wedge and install the expansion water stop pin so that the grout is completely dense from deep to the surface until all holes and gaps are plugged.
4.Grouting: Test pressure with a high-pressure grouting machine and pour chemical grout into grout holes. Proceed continuously one by one for a single hole. After all the holes are filled, return to the first grouted hole and grout again to ensure maximum pressure.
5.Removal: After 24 hours of grouting and after confirming no leakage, the exposed grout nozzle can be removed or knocked off to clean up the solidified and overflowing grout.
6.Reinforcement: Overall plugging with leak-proof cement-based penetration crystallization pressure resistance sealant, wiping the surface with rigid RG adhesive strips for protective layer reinforcement, and finally polymer JS waterproofing coating, three times the surface waterproofing treatment.
Loading...
Loading...
Loading...
Loading...